
What’s the Best Way to Install Recessed Lighting in a Basement Expert Tips
- Marvin Little

- Mar 3
- 10 min read
The best way to install recessed lighting in a basement is through careful planning and the right tools. Start by deciding on the layout and choosing suitable fixtures.
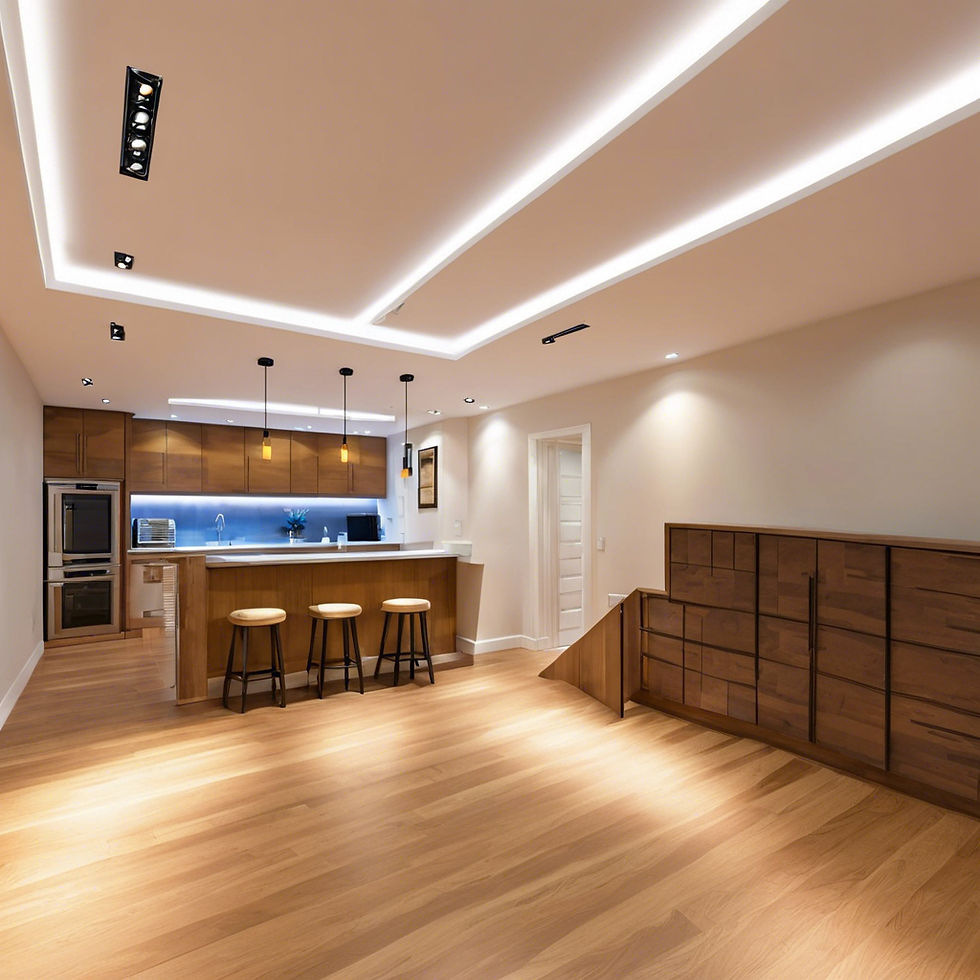
Installing recessed lighting can transform a dark basement into a welcoming space. It’s not just about the lights; it's about placement and wiring too. Proper installation ensures even lighting and enhances the room's appearance. Before beginning, consider the ceiling type and height, as these factors affect installation.
Gather your tools, measure the space, and plan the layout. This introduction will guide you through each step, ensuring a smooth and successful installation. Ready to brighten your basement? Let’s dive in and make your space shine.

Planning Your Lighting Layout
Installing recessed lighting in a basement can transform the space. A well-planned lighting layout is crucial. It ensures even light distribution and enhances the room's functionality.
Assessing The Space
First, assess the size and shape of your basement. Measure the length and width of the room. Note any architectural features like beams, ductwork, or low ceilings. These can affect your lighting placement. Consider the room's purpose. Will it be a living area, a home office, or a game room? Different activities require different lighting needs.
Determining Lighting Needs
Next, determine the amount of light required. Basements often need more light due to lack of natural light. Use this simple formula: Multiply the square footage of the room by 1.5. This gives you the total wattage needed. For example, a 300 square foot room needs 450 watts.
Choose the type of bulbs. LED bulbs are energy-efficient and last longer. They come in
various brightness levels and colors. Select a color that suits the room's ambiance.
Use a grid layout for even light distribution. Space the lights 4 to 6 feet apart. Avoid placing lights too close to walls. This prevents shadows and creates a balanced look.
Room Size (sq ft) | Total Wattage | Number of Lights (10W each) |
100 | 150 | 15 |
200 | 300 | 30 |
300 | 450 | 45 |
Use dimmer switches. They allow you to control the light intensity. This is helpful for creating different moods. Plan ahead for electrical outlets. Ensure they can support the new lighting fixtures. Consult with a licensed electrician if necessary. Proper planning ensures your basement is well-lit and functional. Enjoy your new space!
Choosing The Right Fixtures
Installing recessed lighting in your basement can brighten up the space. But choosing the right fixtures is crucial. The right fixtures will provide the best lighting and enhance the room's look.
Types Of Recessed Lights
There are several types of recessed lights. Each has its own features and benefits.
● Standard Recessed Lights: These are commonly used and offer general lighting.
● Adjustable Recessed Lights: These allow you to direct light to specific areas.
● LED Recessed Lights: These are energy-efficient and have a long lifespan.
● Shallow Recessed Lights: Perfect for areas with limited ceiling space.
Considerations For Basements
Basements have unique needs.
Here are some key considerations:
1. Ceiling Height: Low ceilings may need shallow fixtures.
2. Moisture Levels: Basements can be damp. Choose fixtures designed for damp environments.
3. Insulation: If your basement ceiling is insulated, use IC-rated fixtures.
4. Light Distribution: Ensure even light distribution to avoid dark spots.
Choosing the right fixtures is key for a well-lit basement. Consider these factors and select the best options for your space.
Gathering Necessary Tools And Materials
Installing recessed lighting in a basement can transform the space. The first step is gathering the right tools and materials. This ensures a smooth installation process. Below are the essential tools and required materials you need.
Essential Tools
● Drill: Used for making holes in the ceiling.
● Wire Strippers: Needed for stripping wires.
● Voltage Tester: Ensures the power is off before starting.
● Drywall Saw: For cutting holes in the ceiling.
● Measuring Tape: Helps in precise measurement.
● Level: Ensures the lights are even.
Required Materials
● Recessed Lighting Fixtures: Choose the right size for your space.
● Electrical Boxes: For housing electrical connections.
● Wire Connectors: Connect wires safely.
● Electrical Cable: Used to connect the lights.
● Light Bulbs: Ensure they are compatible with your fixtures.
● Switches and Dimmers: Control the lighting.
Tool | Purpose |
Drill | Making holes in the ceiling |
Wire Strippers | Stripping wires |
Voltage Tester | Ensuring power is off |
Drywall Saw | Cutting holes in the ceiling |
Measuring Tape | Precise measurement |
Level | Ensuring lights are even |
Having the right tools and materials is essential. It makes the installation process easier and safer. Follow this guide to gather everything you need for your basement lighting project.

Safety Precautions
Installing recessed lighting in a basement requires several safety precautions. Your safety is the top priority. Before starting any electrical work, follow these steps to ensure a safe and successful installation.
Turning Off Electricity
Always turn off the power to the area where you will be working. This is crucial to avoid any
electric shocks. Follow these steps:
1. Go to your home's main electrical panel.
2. Locate the circuit breaker that controls the basement.
3. Switch it to the "off" position.
After turning off the electricity, use a voltage tester to confirm there is no power. This extra step ensures your safety.
Using Safety Gear
Wearing the right safety gear is essential.
Here is what you need:
● Safety Glasses: Protects your eyes from debris.
● Gloves: Prevents cuts and electrical shocks.
● Dust Mask: Avoids inhaling dust and particles.
Ensure your workspace is well-lit and free of obstacles. This helps you move safely and avoid accidents. Having a clear plan and the right tools will make the installation process smoother and safer.
Marking The Ceiling
Installing recessed lighting in a basement can transform the space. The first step is marking the ceiling. Proper markings ensure accurate placement. This section covers measuring and creating cutout templates.
Measuring And Marking
Begin by measuring the dimensions of your basement. Identify where you want the lights. Consider the layout of the room and any obstacles.
● Use a tape measure to find the center of the room.
● Mark this point with a pencil.
● Measure and mark the distance between each light.
Ensure each mark is evenly spaced. This creates a balanced look. Using a laser level helps keep lines straight.
Creating Cutout Templates
Next, create cutout templates. These guide your cuts in the ceiling. Use the light fixture's dimensions for accuracy.
1. Trace the fixture's outline onto cardboard.
2. Cut out the traced shape.
3. Place the template on each marked spot.
Trace around the template with a pencil. This gives you the exact area to cut. Repeat for each light location. Double-check all markings before cutting.
Cutting The Holes
Installing recessed lighting in your basement can brighten the space. The first major step involves cutting the holes for the lights. This task requires precision to avoid damaging ceiling joists or existing wiring. Below are some useful tips on how to cut the holes correctly.
Using A Hole Saw
A hole saw is the best tool for cutting holes for recessed lighting. It ensures clean, even cuts.
Follow these steps:
1. Measure the diameter of the recessed lighting can.
2. Select a hole saw of the same size.
3. Mark the center of the hole on the ceiling.
4. Attach the hole saw to your drill.
5. Drill slowly to maintain control and precision.
Tip: Always wear safety goggles to protect your eyes from debris.
Dealing With Obstacles
Obstacles like joists or existing wiring can complicate the installation.
Here’s how to handle them:
● Joists: Avoid cutting into ceiling joists. Adjust the hole location if needed.
● Wiring: Turn off the power before cutting. Use a stud finder to locate wires.
● Pipes: Check for any plumbing pipes in the ceiling. Adjust the hole placement accordingly.
If you encounter unexpected obstacles, consult a professional electrician for advice.
Wiring The Lights
Installing recessed lighting in a basement can brighten up the space. Wiring the lights is a crucial step. It ensures your basement lighting is safe and functional. This section will guide you through the wiring process.
Connecting The Wires
Connecting the wires correctly is essential for safe operation.
Follow these steps:
1. Turn off the power to the circuit you are working on. Use a voltage tester to confirm the power is off.
2. Run the electrical cable from your power source to each light location. Use a fish tape to pull the cable through the walls and ceiling.
3. Strip the insulation from the ends of the wires. Use a wire stripper for clean, even cuts.
4. Connect the wires to the light fixture. Match the black wire to black, white wire to white, and ground wire to ground. Use wire nuts to secure the connections.
5. Wrap electrical tape around the wire nuts for extra security.
Installing Junction Boxes
Junction boxes protect your wire connections. They make future maintenance easier.
Here’s how to install them:
● Choose a location for the junction boxes. Ensure they are accessible but hidden from view.
● Mount the junction boxes to the ceiling or wall studs using screws. Ensure the boxes are secure and level.
● Run the electrical cable through the knockouts in the junction boxes. Use cable clamps to secure the cable in place.
● Make the wire connections inside the junction boxes. Follow the same steps as in the "Connecting the Wires" section.
● Cover the junction boxes with their respective covers. This keeps the connections secure and safe.
Remember, always follow local building codes and regulations. Proper wiring ensures your recessed lighting is safe and reliable.
Installing The Fixtures
Recessed lighting can transform a basement into a bright, welcoming space. The key to success is proper fixture installation. Follow these steps for a seamless setup.
Securing The Lights
First, choose the right spots for your recessed lights. Mark the positions on the ceiling. Use a stud finder to avoid joists and other obstacles. Cut holes according to the light fixture size.
Next, run electrical wiring to each hole. Ensure the power is off before touching wires.
Connect the wires to the recessed light housing. Secure the housing into the ceiling hole.
Most fixtures come with clips or brackets for easy attachment. Ensure the housing is flush with the ceiling. Tighten the clips or brackets securely. Repeat these steps for each light fixture. Double-check all connections are tight and secure.
Testing The Installation
After securing the lights, it's time to test the installation. Turn on the power at the breaker box. Switch on the lights to see if they work. If a light doesn't turn on, check the wiring connections. Make sure no wires are loose or disconnected. If all lights work, you're almost done. Observe the lights for a few minutes. Ensure they don't flicker or make noise.
Flickering or noise may indicate a wiring issue. Address any problems immediately to ensure safety. Finally, install the trim and bulbs. Many recessed lights come with a decorative trim. Attach the trim around the light housing. Insert the light bulbs into the fixtures. Enjoy your bright new basement lighting!
Finishing Touches
Once you have installed the recessed lighting fixtures in your basement, it's time for the finishing touches. These steps ensure your lighting looks polished and operates efficiently. This section covers two important aspects: Adding Trim Kits and Final Adjustments.
Adding Trim Kits
Trim kits are the visible part of recessed lights. They can add a clean, finished look to your basement.
Here’s how to install them:
1. Choose the right trim kit for your fixtures.
2. Ensure the power is off before you start.
3. Insert the trim kit into the housing.
4. Secure it with the provided clips or springs.
Common types of trim kits include:
● Baffle Trim: Reduces glare and softens the light.
● Reflector Trim: Increases light output.
● Wall Wash Trim: Directs light to a specific area.
Trim kits not only improve aesthetics but also affect light distribution. Choose the one that suits your needs best.
Final Adjustments
After installing the trim kits, make some final adjustments to ensure everything works perfectly:
Task | Description |
Test the Lights | Turn on the lights to check for any issues. |
Adjust the Direction | Focus the light where needed. |
Dimmer Switch | Install a dimmer switch for adjustable lighting. |
Inspect for Safety | Ensure all connections are secure and safe. |
By following these steps, you can ensure your recessed lighting in the basement looks great and works efficiently.

Troubleshooting Common Issues
Installing recessed lighting in a basement can be challenging. Sometimes, issues arise after installation. Addressing these common problems ensures your lighting works perfectly. Let's explore how to resolve some of these issues.
Flickering Lights
Flickering lights are a common problem. They can be caused by several factors.
Here are some steps to troubleshoot:
● Loose Bulbs: Ensure bulbs are tightly screwed in.
● Faulty Wiring: Check for any loose or damaged wires.
● Dimmer Switches: Verify compatibility with your bulbs.
● Overloaded Circuit: Reduce the number of lights on the circuit.
Uneven Illumination
Uneven illumination can make a space look unappealing. Fixing this issue involves a few steps:
● Placement: Ensure lights are evenly spaced.
● Bulb Type: Use bulbs with consistent brightness and color temperature.
● Reflectors: Install reflectors to direct light more evenly.
● Fixture Type: Choose fixtures that distribute light uniformly.
Frequently Asked Questions
How Do You Plan Recessed Lighting Layout?
Planning the layout involves measuring the room, marking fixture locations, and ensuring even light distribution. Use a grid pattern for consistency.
What Tools Are Needed To Install Recessed Lighting?
You need a drill, hole saw, wire stripper, voltage tester, and a screwdriver. Safety gear is also essential.
How To Wire Recessed Lights?
Turn off power, run wires through the ceiling, connect them to the fixture, and secure with wire nuts.
Can You Install Recessed Lighting In A Drop Ceiling?
Yes, you can. Use special brackets for drop ceilings to ensure stability and proper installation.
Conclusion
Installing recessed lighting in a basement enhances its functionality and appearance. Start by planning the layout. Measure and mark the spots for lights. Cut holes carefully and run the wiring. Connect to a switch for easy control. Ensure your safety by turning off the power.
Hiring a professional can simplify the process if unsure. Proper lighting transforms your basement into a cozy, inviting space. Enjoy a brighter, more useful basement with well-installed recessed lighting.
Ready to bring your home improvement dreams to life?
At MidCity Handyman & Remodeling, we specialize in turning visions into reality with quality craftsmanship and personalized service. Whether you're planning a remodel, repair, or upgrade, our team is here to make it happen.
Contact Us for a Free, No-Obligation Quote:
Website: midcityhr.com
Email: info@midcityhr.com
Phone: (716) 477-5520
Facebook: facebook.com/MidCityHR
Follow us on Facebook for updates on our latest projects and helpful tips. Let’s make your home everything you’ve dreamed of!


